This is just a little fun one. If you’ve seen randomly generated noise maps, or those mazes that are different every time you hit refresh, and wanted to know just how they work, then hey, i’m guess i’m here to show you. You’ll also learn a few basics about generating grids too.
That last one is probably the takeaway here that you’ll need the most. Grids show up in programming all the time, and i’ve rarely seen good explanations of them. Maybe there’s some good central location that everyone else uses but no one ever pointed it out to me. This is also a good intro for programmatically generating art. We’ll start with some basics for today’s lessons, and then set up something a bit more comprehensive later.
Prerequisites
Basic coding knowledge. You should know if/else statements, for loops and functions. You don’t necessarily have to know html syntax but it’ll help.
Making Noise
We’ve all seen random visual noise in some form. It’s the term we use for that weird cloudy static stuff.
To achieve this effect, we need to do the following:
- Create a grid.
- Create a function that goes through each space of that grid.
- In each space, decide at random whether to mark it as a white space or a black space.
- In each space, mark the appropriate space.
That’s it. Doesn’t seem so hard, does it?
Let’s get Started.
If this is your first time playing with HTML5, take a quick moment to head over to the starter page to setup your canvas. Takes about a minute. See you in a mo.
First off, let’s get a few properties up and running.
const canvas = document.querySelector('canvas')
const c = canvas.getContext('2d')
canvas.width = 2048
canvas.height = 1152
const tileSize = 1
Nothing too special here. The top two canvas lines are requirements to get the script file speaking to the canvas in the way we want. We’re creating the noise on a 2d plane, so we want to ensure we’re constantly referring to it. That const c will allow us to do that.
The canvas width and height is going to determine the size of our noise field and eventual maze.
The tilesize is what it sounds like. The size of each tile in the grid. Each tile will be a square, so only one value is needed for width and height.
Next we’re going to create three separate functions that will help us create the noise field.
function Vector(){
}
function CreateTile(){
}
function CreateGrid(){
}
And at the bottom of all of that, we’ll have a method to the last function. This little line basically tells the rest of the program to start working (make sure it sits by itself and not within any of the curly brackets).
CreateGrid()
Let’s add to each of the functions one at a time.
Vector()
function Vector(){
    return {x: 0, y: 0}
}
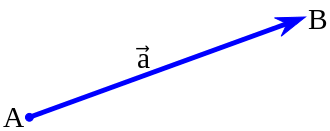
The Vector function is a lot simpler than it looks. It’s just used to store two values and then return them. We’ll be using this function when we’re creating the tiny lines that will make up our noise map.
Each line will have two points to it. A starting point, called lineStart, which has an x and y coordinate, and an ending point, called lineEnd, also with an x and y coordinate. These four values will allow us to create a single line using HTML5’s built in drawLine function.
CreateTile()
Next up comes creating each tile within our grid. We’re not really so much creating a tile in the grid at the stage. It’s more we’re reserving a point in the grid to print out a single tiny line, which will be one tiny spec in our noise field. CreateTile has three parts to it, and it’s doing most of the work, so it’s best we go through each bit one at a time.
Dump the following into the CreateTile function.
const randomNumber = Math.random()

if (randomNumber > 0.5){
} else {
}
The first property (the randomNumber bit) does exactly what it sounds like it’s doing. Each time CreateTile is called, a random number between 0 .0 to 1.0 is called. It remembers this number to choose an action using an if/else statement.
Now we setup creating the lines.
const lineStart = new Vector()
const lineEnd = new Vector()
lineStart and lineEnd are two vectors created by the Vector function we made a moment ago. With these two vectors you’ll be able to make any line. Let’s create one now. Here we’ll be making a Backslash (\) type of line. Put the following between the curly brackets if the randomNumber if statement
if (randomNumber > 0.75) {
    lineStart.x = tile.x
    lineStart.y = tile.y + tileSize
    lineEnd.x = tile.x + tileSize
    lineEnd.y = tile.y
}
Whoa! Take a moment if this throws you off. I won’t deny seeing something like this took my brain out for a moment the first time i saw it. Let’s take a moment to break down each line.
lineStart.x = tile.x
This is the first part of the first vector we called earlier. If we think of it on a graph, this is the x value of where you want your line to start. Don’t worry about where tile.x came from for now. That will show up in the CreateGrid function shortly, but it’s purpose will be to tell the line where on the grid it should be drawn.
lineStart.y = tile.y + tileSize
This is the same as the x coordinate. Remember we’re making a backslash here, so we add the tileSize to the y coordinate.
    lineEnd.x = tile.x + tileSize
    lineEnd.y = tile.y
These two lines cover the opposite point of the tile, which makes sense since it means we’re going top left to bottom right. Each tilesize has the same width and height, so we can use the tileSize value regardless of which axis we’re using.
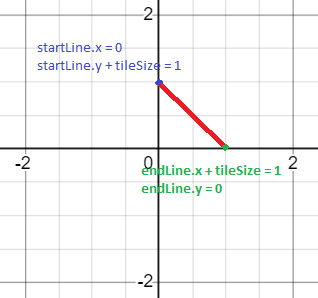
Got a general idea of it? Good, let’s add a forward slash to that else statement.
else {
    lineStart.x = tile.x
    lineStart.y = tile.y
    lineEnd.x = tile.x + tileSize
    lineEnd.y = tile.y + tileSize
}
This sholdn’t require too much extra explanation. The lineStart Vectors denote a point in the bottom left. The lineEnd Vectors denote a point in the top right. Together they make a forward slash.
Then we just need to draw the line. Dump the following after the else statement.
c.beginPath();
c.moveTo(lineStart.x,lineStart.y);
c.lineTo(lineEnd.x,lineEnd.y);
c.stroke();
These four little methods are the standard HTML5 for drawing a line. Each part should be self explanatory and we only need to use these the once so we don’t have to worry too much about this.
CreateGrid()
Pop the follow into your CreateGrid function and let’s go through it a bit at a time.
for (let i = 0; i < canvas.width; i += tileSize) {
    for (let j = 0; j < canvas.height; j += tileSize){
        const tile = new Vector()
        tile.x = i
        tile.y = j
        CreateTile(tile)
    }
}
The two for loops here are how your grid will be create. Notice that the second statement of each for loop refers to the canvas width and height, and that the third statement refers to the tile size. The loop starts at the top left (essentially zero), creates a column of tiles the total of the canvas height, then moves along one row on the grid and creates the next column. It repeats this until the width of the canvas is reached.
Next we call a new Vector called tile. Since it’s a Vector it has an x and y that can be returned. We can use the i and j values in the for loop and set them as the x and y values. Why you ask? Because we’ve been incrementing the for loop using tileSize, meaning everytime i and j are incremented, they’re now set as the next part of the grid. If your tile size was set to four, they would go up the grid as 0,4,8,12,16… This simple grid lets us create perfect grids every time with a lot less coding.
After this, it’s just a case of using the CreateTile function with our tile vector. Now when create grid is called, it uses the tile vector as its reference point for drawing the appropriate line.
Good to go.
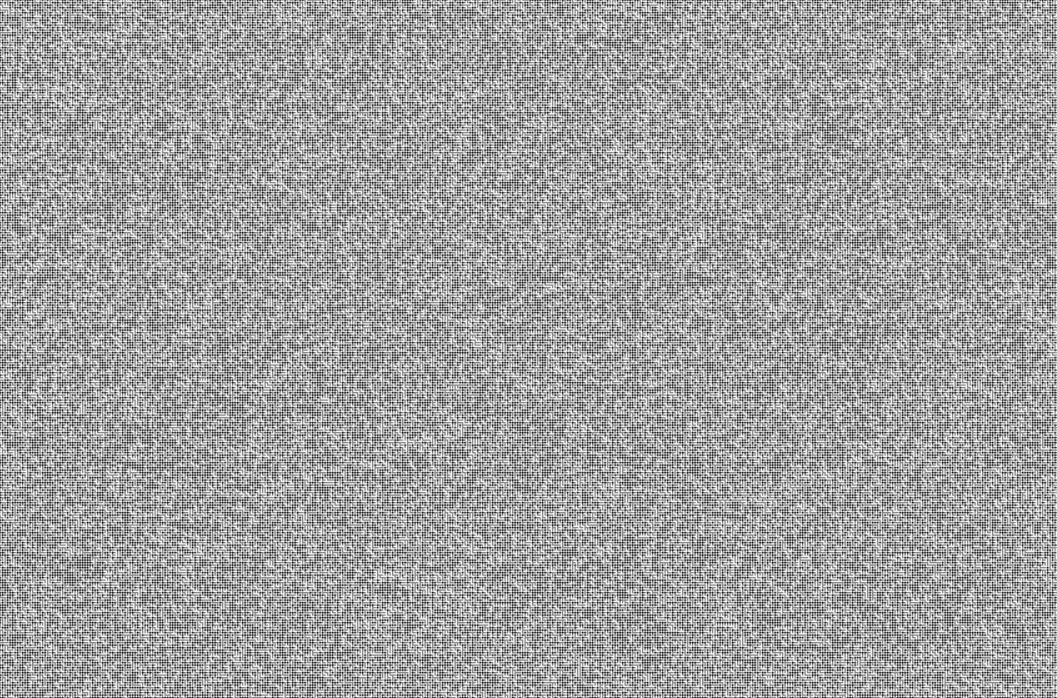
Let’s run that code and see what we get.
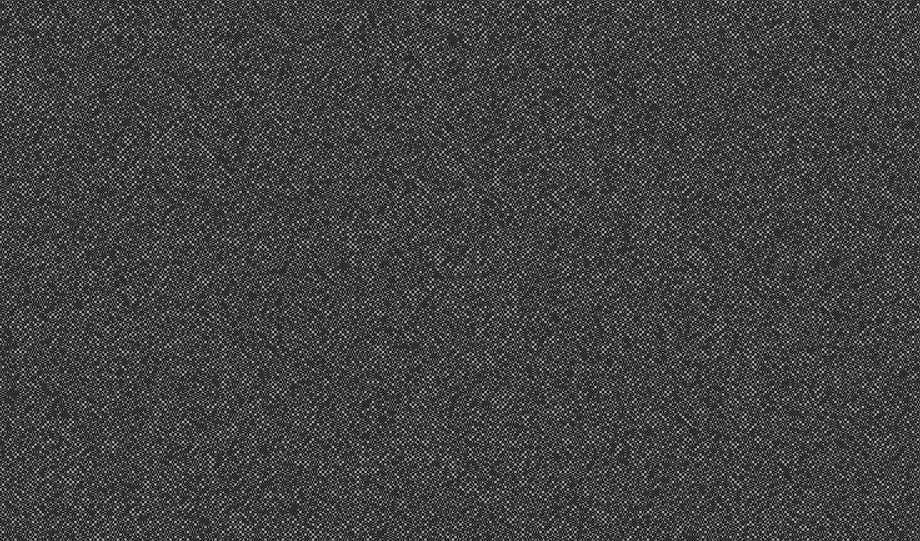
Not bad. We made some noise using nothing but our words. We could probably make it a bit noiser though. Let’s add some more types of line to our CreateTile function. Replace the current CreateTile with the one below.
function CreateTile(tile){
const randomNumber = Math.random()
const lineStart = new Vector()
const lineEnd = new Vector()

if (randomNumber > 0.75) {
    lineStart.x = tile.x
    lineStart.y = tile.y + tileSize
    lineEnd.x = tile.x + tileSize
    lineEnd.y = tile.y
} else if ( randomNumber > 0.5 && randomNumber < 0.75){
    lineStart.x = tile.x
    lineStart.y = tile.y
    lineEnd.x = tile.x + tileSize
    lineEnd.y = tile.y + tileSize
} else if ( randomNumber > 0.25 && randomNumber < 0.5){
    lineStart.x = tile.x
    lineStart.y = tile.y
    lineEnd.x = tile.x
    lineEnd.y = tile.y + tileSize
} else {
    lineStart.x = tile.x
    lineStart.y = tile.y
    lineEnd.x = tile.x + tileSize
    lineEnd.y = tile.y
}
//drawLine (lineStart.x, lineStart.y, lineEnd.x, lineEnd.y)
c.beginPath();
c.moveTo(lineStart.x,lineStart.y);
c.lineTo(lineEnd.x,lineEnd.y);
c.stroke();
}
Again, don’t panic if that looks complicated. We’ve added three things. First, we’ve added some else if statements to allow for more types of lines. Before, there was a 50/50 chance between two types of noise. Now, there are four types of noise, each with a 25% chance of being used for each tile.
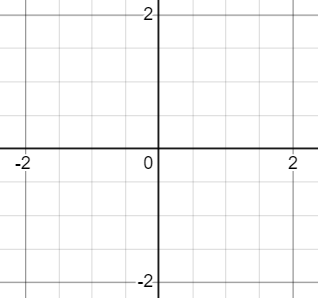
Next we’ve added two new types of line. The first is simply a vertical line. The second is just a horizontal. Why not try mentally mapping one using the chart below.
Now refresh the page and see how your noise has changed.
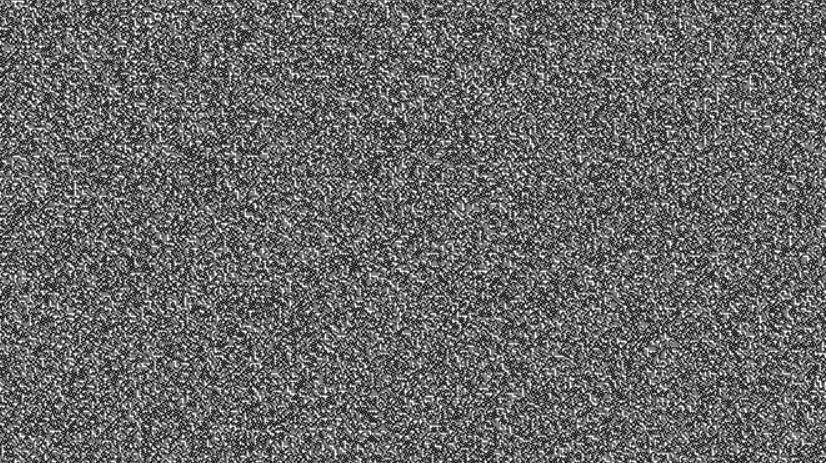
The noise is now grainier than it was before, getting it closer to that old television static look.
And now for the big reveal, because, as some of you may have already guessed…
You’ve been creating a maze all along.
You may have been suspecting it with the backslash and horizontal lines, but the noise we’ve been creating is actually a really big maze with really tiny walls.
Don’t believe me (geez)? Try changing your tileSize variable at the top of your code from 2 to 24, and then refresh the page again.
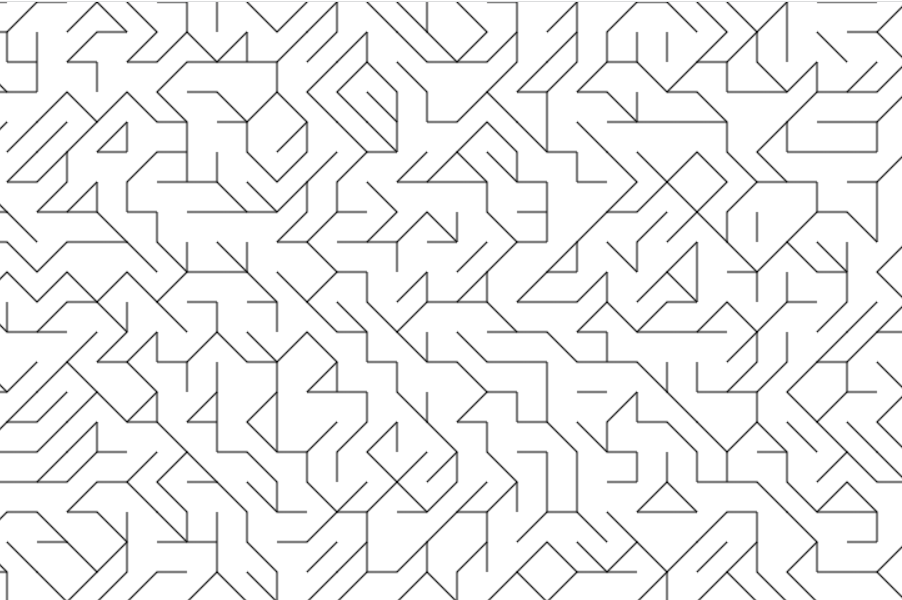
There you go. One maze, or rather, infinite mazes. It’ll change each time you hit refresh.
Now technically, these aren’t true mazes. There’s no start or end point, or even a definite correct solution. We’ll add that in another time. This is more Maze art.
Playaround
The whole code is in place now. Feel free to add to it. You could try changing the size of the tiles or canvas, change the random number probability to make some lines more likely than others. You can even try adding more types of line if you’re up for figuring out some more complex paths. Have fun and let me know what you think of this tutorial in the comments below.